Console Setup
BidMachine seamlessly integrates with Unity LevelPlay (formerly IronSource) mediation as both a bidding adapter and a custom waterfall adapter, giving you the flexibility to optimize your monetization strategy. Both integration types can run simultaneously, allowing you to combine the efficiency of real-time bidding with the control of waterfall placements.
This guide covers:
- Auto Setup: Quick configuration using the BidMachine Helper Chrome extension
- Manual Setup: Step-by-step manual configuration for bidding and waterfall adapters
- Advanced Setup: High-value audience segmentation for increased revenue
Auto Setup (Recommended)
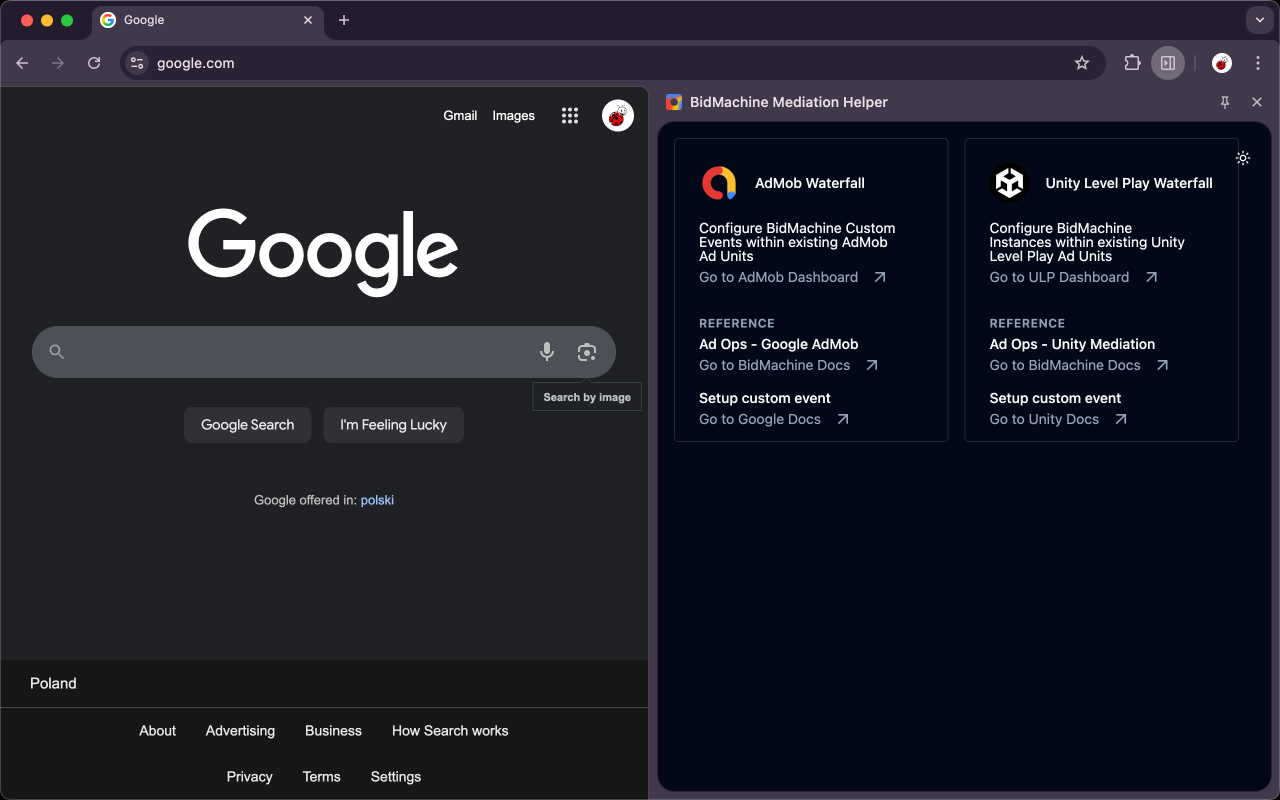
The BidMachine Mediation Helper Chrome extension automates the configuration process for Unity LevelPlay.
Installation and Setup
-
Install the extension Add the BidMachine Mediation Helper Extension to Chrome.
-
Navigate to Unity LevelPlay Open the extension and go to the Unity LevelPlay dashboard. The extension will automatically detect your account and associated apps.
-
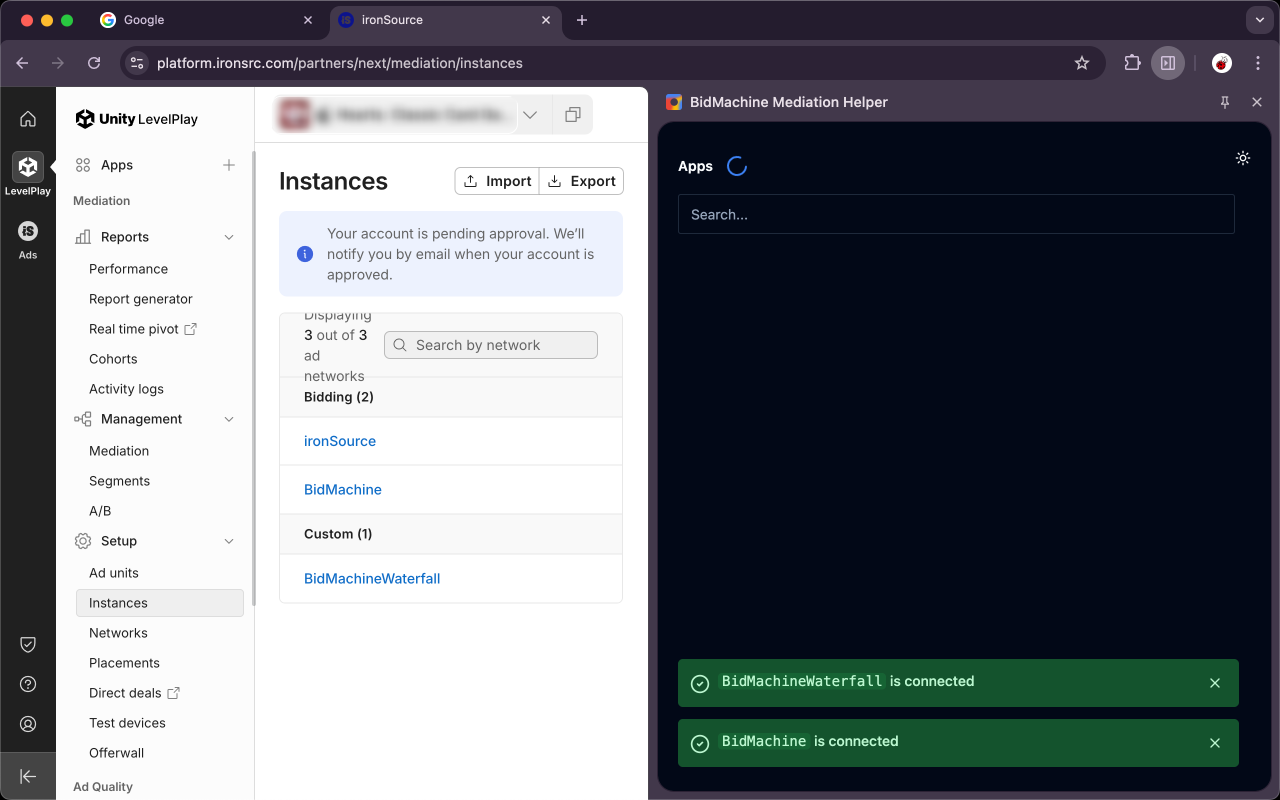
Review network status Check the sidebar panel for any warnings about missing networks. Follow the provided instructions to add any required networks. When properly configured, you'll see confirmation messages.
Automated Configuration
-
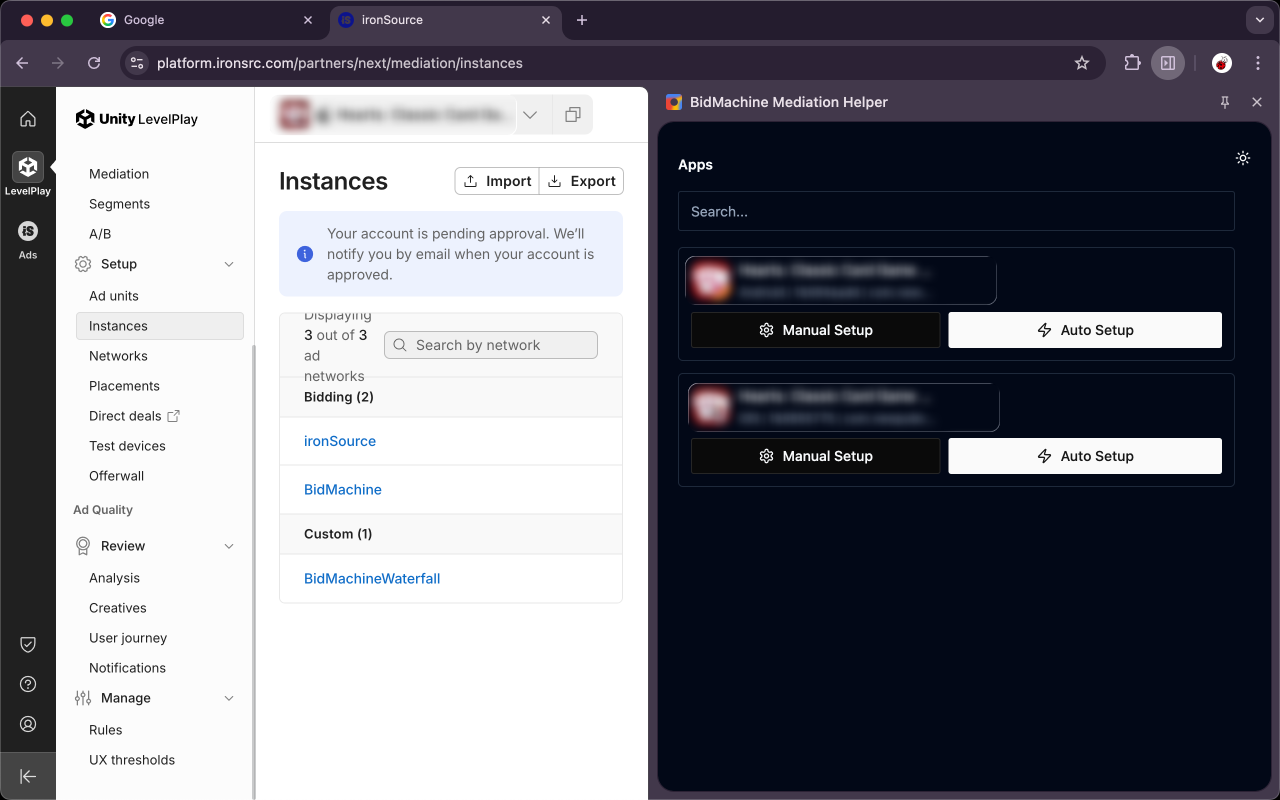
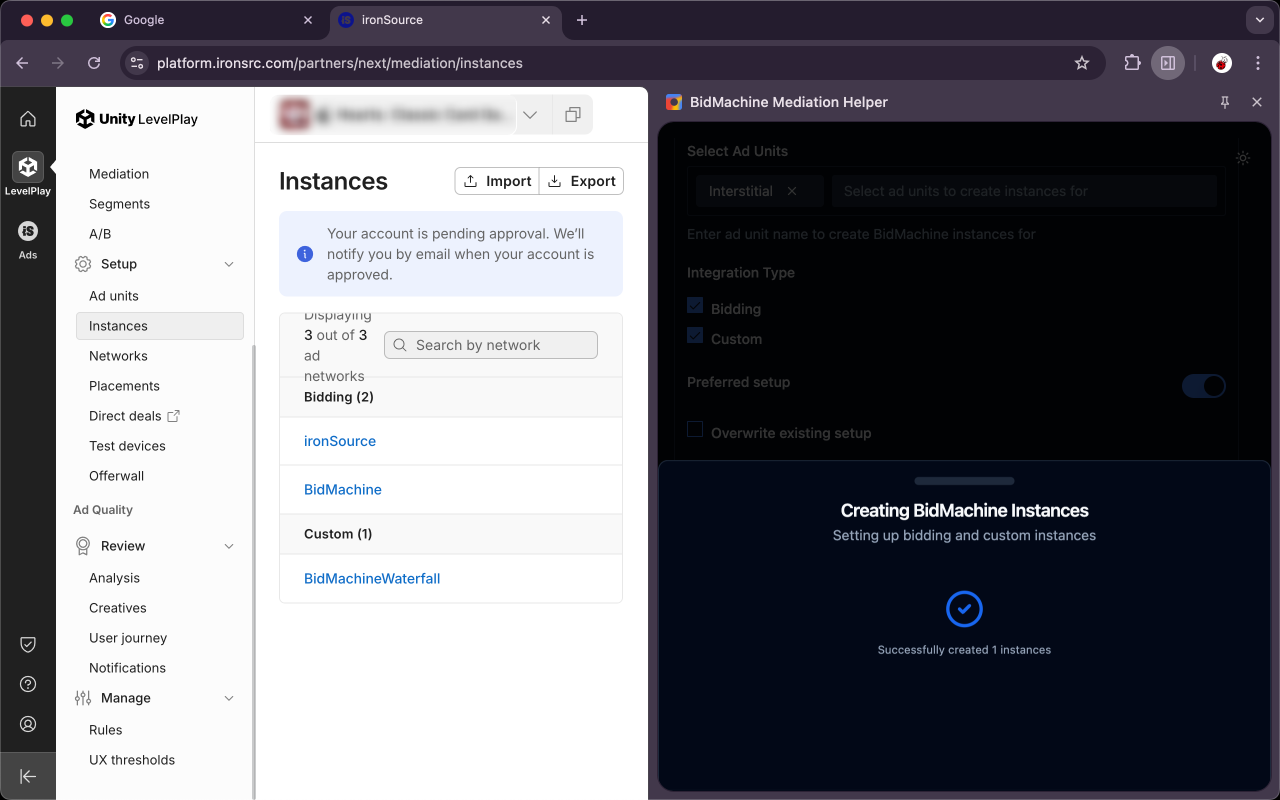
Run auto setup Select your app and click the Auto Setup button. The extension will create all recommended instances (both bidding and custom waterfall) for all available ad units in the selected app.
noteAuto setup only creates missing instances and does not remove or modify existing configurations.
Manual Configuration (Optional)
-
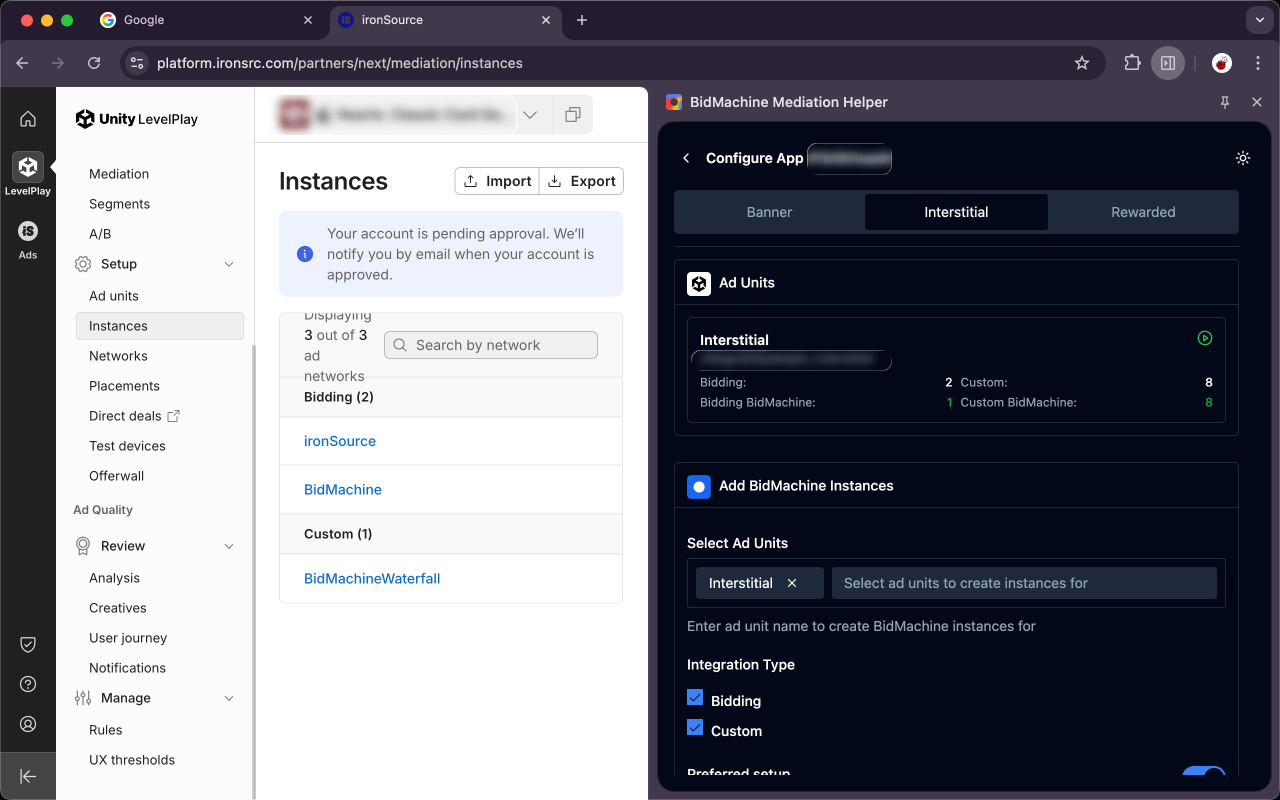
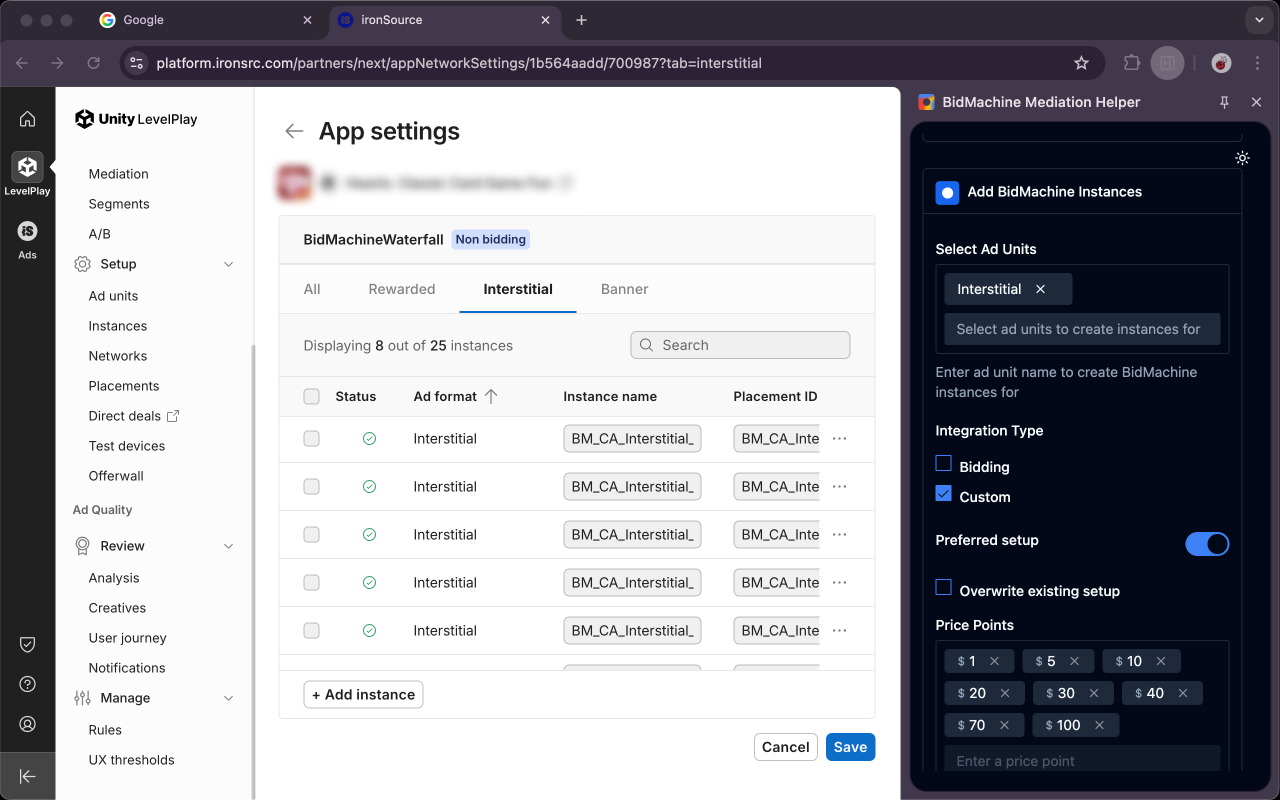
Configure custom price points For granular control over price points and ad units, use the manual configuration option.
-
Create instances Select the ad type, configure your instance settings, and click Create.
-
Verify in console Newly created instances will appear in the Instances section of your Unity LevelPlay console.
Manual Setup
For advanced users who prefer manual configuration or need custom settings not available through the Chrome extension.
Bidding Adapter
The BidMachine bidding adapter integrates BidMachine's real-time bidding capabilities into your Unity LevelPlay mediation stack. Supported ad formats include banners, MRECs, interstitials, and rewarded videos.
Configuration Steps
-
Navigate to SDK Networks Log in to your Unity LevelPlay account and go to Monetize → Setup → SDK Networks.
-
Activate BidMachine
- Locate BidMachine in the Available Networks table
- Click the Activate button
- Enter your BidMachine credentials
- Click Save
-
Configure the network Select BidMachine from your list of ad networks and click Setup.
-
Enable ad units Activate the ad units you want to use with BidMachine bidding.
Waterfall Adapter
The BidMachine waterfall adapter allows you to integrate BidMachine into your mediation waterfall with manual price control. Supported ad formats include banners, MRECs, interstitials, and rewarded videos.
Network Setup
-
Navigate to SDK Networks Log in to your Unity LevelPlay account and go to LevelPlay → Setup → SDK Networks.
-
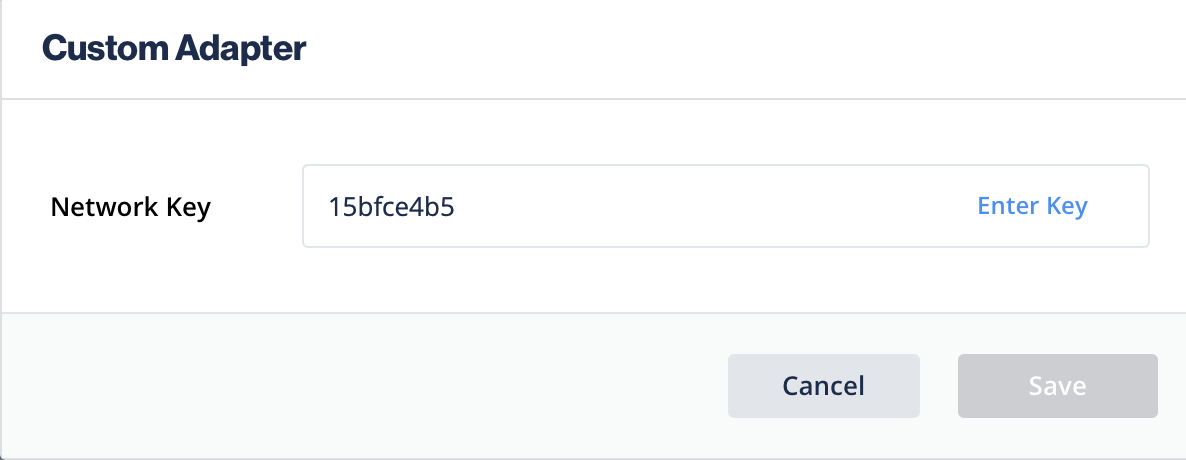
Add custom network
- Click Setup Custom Network
- Enter Network Key:
15bfce4b5 - Click Enter key and then Save
-
Configure revenue settings
- Enter the Source ID provided by BidMachine
- Select Rate based revenue as the revenue model
- Click Save

Your BidMachine waterfall network is now configured and ready for instance creation.
Instance Setup
After configuring the BidMachine waterfall network, create instances for your ad units.
-
Access instances Navigate to SDK Networks in your Unity LevelPlay account.
-
Select BidMachine Waterfall
- Go to the Custom section
- Select BidMachine Waterfall
- Click Setup
-
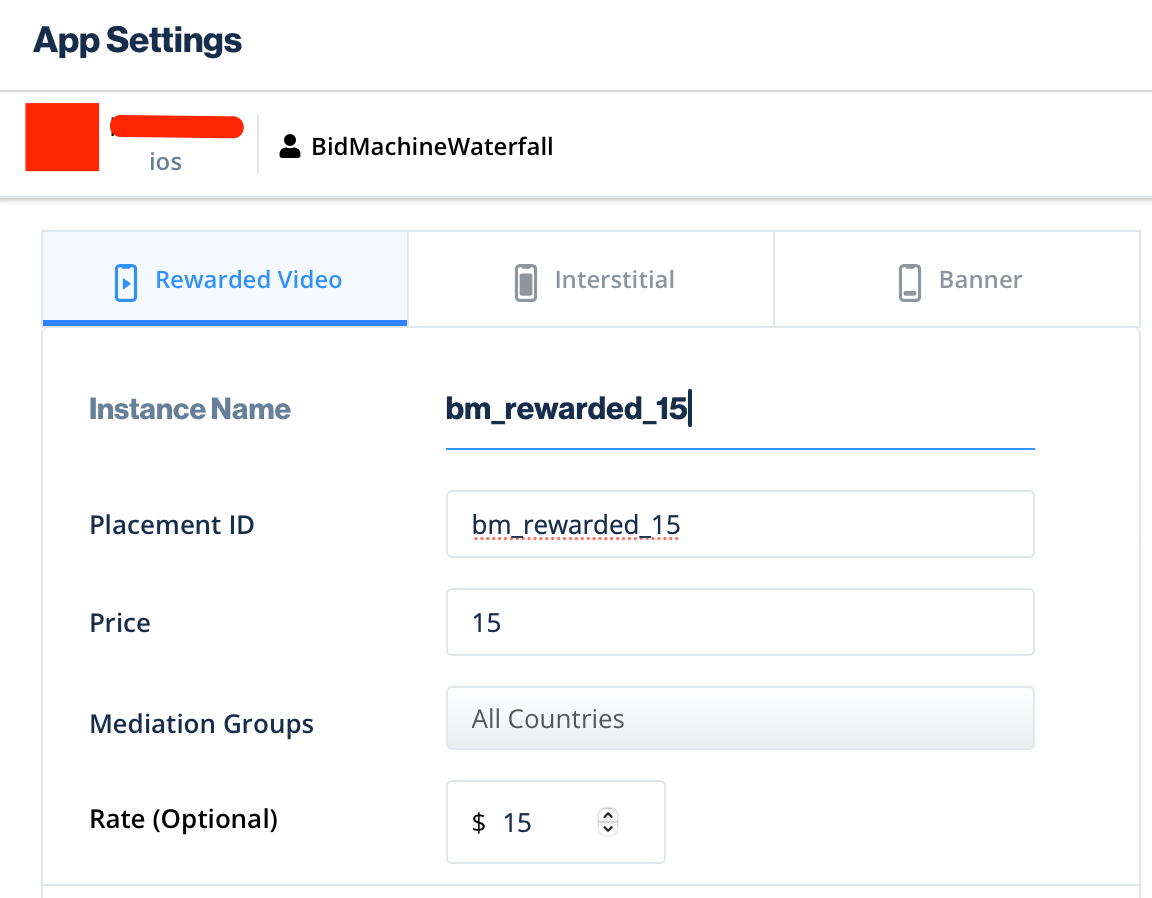
Configure instance settings
- Placement ID: Enter the Placement ID from your BidMachine Dashboard (optional, see Advanced Setup below for use cases)
- Price: Set the CPM price for this instance
- Mediation Group: Select your target mediation group
- Rate: Enter the rate for waterfall sorting (important for correct prioritization)
- Click Save
BidMachine supports multiple placements in the waterfall. Always enter the Rate value to ensure correct waterfall ordering and optimal performance.
Advanced Setup: High-Value Audience Segmentation
Overview
Maximize revenue by leveraging Placement IDs to differentiate and optimize for your most valuable users. By assigning Placement IDs to specific user segments in your Unity LevelPlay setup, you enable BidMachine to recognize ad requests from your high-value audience (HVA) and apply custom optimization strategies.
Benefits
Placement IDs unlock advanced optimization capabilities:
- Differentiated HVA traffic – BidMachine's ad server identifies high-value users and applies tailored strategies including optimized price floors and bidding aggressiveness
- Revenue uplift – Publishers typically see 5-15% performance improvement on HVA segments
- Transparent reporting – Separate metrics for each placement provide clear visibility into segment performance
User Segmentation Strategies
If you're not currently segmenting users, you can start by using your first-party data. Common segmentation approaches include:
| Segment Type | Definition | Expected Uplift |
|---|---|---|
| Revenue-based | Top 20% of users by historical IAA revenue (last 7-30 days) | 5-10% |
| CPM-based | Top 20% of users by average CPM across all ad networks | 5-10% |
| IAP users | Users who have made at least one in-app purchase | 10-15% |
| Engagement-based | Users with high session length or time spent in app | Varies |
Once you've defined your segments, create dedicated Placement IDs for each HVA segment and share them with your BidMachine account manager.
Implementation Steps
Follow these steps to implement HVA segmentation with Placement IDs:
-
Define your segments Identify your high-value user segments using the strategies outlined above.
-
Create Placement IDs Generate Placement IDs in your BidMachine Dashboard for each HVA segment.
-
Configure Unity LevelPlay instances
a. Navigate to instances
Go to Setup → Instances in your Unity LevelPlay dashboard and select BidMachine.

b. Create dual instances
For each ad unit, create two separate instances:
- Standard instance: For regular users (your existing configuration)
- HVA instance: For high-value users, with the BidMachine Placement ID specified


c. Implement dynamic instance selection
In your app code, dynamically select the appropriate instance when generating ad requests based on the user's segment classification.
-
Automatic optimization BidMachine's SDK and ad server will automatically apply optimized strategies for your HVA traffic.
-
Optional: Validation
Verify your implementation with the BidMachine team:
- Include the test IDFA provided by BidMachine in your HVA segment
- Share a debug build of your application
- BidMachine will validate the integration and confirm proper segmentation
By implementing Placement IDs, you enable BidMachine to fully leverage your user segmentation, delivering optimized targeting, increased demand competition, and higher eCPMs for your most valuable users.